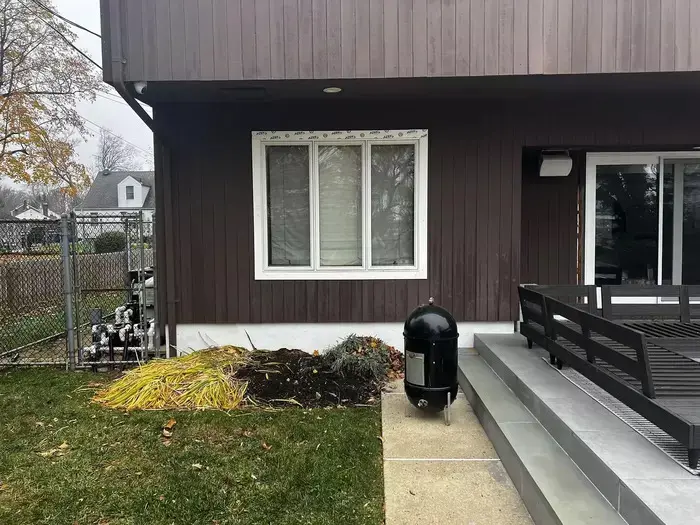
If your home feels drafty, your energy bills keep rising, or you notice water sneaking in during storms, you are not alone. Many homeowners in New Jersey deal with these issues every year. The good news is that learning how to reseal windows can fix these problems quickly and affordably.
In 2026, with rising heating and cooling costs, even small air leaks can make a big difference. Resealing your windows is one of the easiest ways to improve comfort, reduce energy waste, and protect your home from damage.
Signs Your Windows Need Resealing
Before jumping into the process, it helps to know when resealing is necessary. Here are common warning signs:
- Visible cracks, gaps, or peeling caulk around the window frame
- Cold air or drafts are coming through even when the window is shut
- Condensation or frost forming on the inside of the glass in winter
- Water stains, soft spots, or mold along the interior window sill
- A sticky or swollen window frame that is harder to open or close
- Higher than usual heating or cooling bills with no other explanation
- Whistling or rattling sounds when the wind picks up outside
- Yellowish or brownish discoloration where the sealant meets the frame
Benefits of Resealing Windows
Some home maintenance tasks feel optional. This one is not. Here is what properly resealed windows actually do for your home:
- Lower energy bills: Air gaps around windows are one of the top sources of heat loss in New Jersey homes. Sealing them properly helps you improve home insulation without touching your attic or walls.
- Prevent water damage: A small gap in exterior caulk is all it takes for rain to reach the wood frame behind it. Resealing stops that before it starts.
- Reduce indoor humidity: Gaps allow outside moisture to enter your home, which raises indoor humidity levels and promotes mold growth.
- Better comfort year-round: No more cold spots near windows in January. No more warm rooms in August that your AC cannot keep up with.
- Extend window lifespan: Proper sealing protects the frame material from weather damage, giving your existing windows more years of service.
- Quieter home: Fresh caulk also helps reduce outside noise, a real benefit if you live near a busy NJ road or highway.
The cost to prevent window leaks now is far less than the cost to repair water-damaged walls, flooring, or insulation later.
Tools and Materials Needed
Good news: you do not need a lot of equipment for this project. Most of what you need is available at any hardware store in New Jersey, and the total material cost typically runs between $20 and $60, depending on how many windows you plan to tackle.
- Caulk gun
- Exterior or interior sealant (silicone or acrylic latex)
- Utility knife or scraper
- Cleaning cloth
- Rubbing alcohol or a mild cleaner
- Painter’s tape
- Gloves
Choosing the right sealant is important, especially for window caulking in NJ, where weather conditions can be harsh.
How to Reseal Windows (Step-by-Step Guide)
Follow these steps carefully, and you will get a clean, professional-looking result on your first attempt. Don’t rush the preparation – take the time to do it properly. Rushing the preparation is the single biggest reason DIY caulk jobs fail early.
Step 1: Remove All Old Caulk
Use a utility knife or a specialized caulk remover to carefully strip out the old sealant. Work carefully along both edges of the old caulk bead and peel it away in strips. Be thorough. Any old caulk left behind will prevent the new sealant from bonding properly.
For stubborn areas, use a plastic scraper rather than a metal one to avoid scratching the window frame or surrounding trim.
Step 2: Clean the Surface Thoroughly
This part is more important than it seems at first. Wipe down the entire area where you will be applying new caulk with rubbing alcohol or a mild cleaning solution. Remove all dust, grease, old adhesive residue, mold, and moisture.
Make sure the area is completely dry before you move on. In NJ’s humid months, this can take longer than you expect. Give it at least 30 to 60 minutes of drying time, or speed it up with a clean fan nearby.
Step 3: Apply Painter’s Tape for Clean Lines
Run painter’s tape along both sides of the gap you are about to fill. This keeps the new caulk exactly where it should be and gives you a crisp, finished look when the tape is removed.
For corners and tight spots, take extra care to press the tape down firmly so fresh caulk does not seep underneath.
Step 4: Fill Large Gaps with Backer Rod (If Needed)
If the gap is larger than roughly 1/4 inch, insert a foam backer rod into the opening before applying caulk. The backer rod gives the caulk something to bond to and prevents it from sinking too deep into the gap, which would cause it to crack over time.
Step 5: Load and Cut Your Caulk Tube
Insert your caulk tube into the caulk gun. Cut the nozzle at a 45-degree slant. Start with a small opening, about 3/16 of an inch. You can always cut more off if the bead is too thin, but you cannot put it back.
Puncture the inner foil seal with a nail or the built-in poker on your caulk gun if your model has one.
Step 6: Apply the Caulk in One Smooth Pass
Hold the caulk gun at a 45-degree angle and move steadily along the gap, applying consistent pressure. Try to complete each side of the window in one uninterrupted pass. Starting and stopping creates uneven spots that are harder to smooth out.
Aim for a bead that slightly overfills the gap. You will tool it down in the next step.
Step 7: Smooth the Caulk Bead
Within a minute or two of applying the caulk, use a wet, gloved finger or a smoothing tool to press the bead firmly into the gap and create a slightly concave, clean surface. A properly tooled bead bonds better and looks more professional.
Dip your finger lightly in soapy water to prevent the caulk from sticking to your glove as you smooth.
Step 8: Remove the Tape While Caulk Is Still Wet
Pull the painter’s tape away slowly and at a low angle while the caulk is still fresh. If you wait until it is dry, the tape can tear the caulk and ruin your clean edge. Remove it within 5 to 10 minutes of applying.
Step 9: Allow Full Cure Time Before Exposure
Silicone sealant usually needs about 24 to 48 hours to cure completely. Latex caulk cures faster, often within a few hours. During this time, keep the area dry and avoid touching or painting over it. Always refer to the product label to confirm the exact curing time.
How to Reseal Windows Inside vs Outside?
The process is similar for both locations, but the materials, priorities, and conditions are different. Here is a practical breakdown:
Knowing how to reseal windows inside is important for controlling drafts and managing interior moisture. Knowing how to reseal windows outside is critical for waterproofing and protecting the structural integrity of your home.
| Resealing Windows Inside | Resealing Windows Outside |
|---|---|
| Use paintable acrylic or siliconized acrylic caulk | Use 100% silicone or high-grade exterior caulk |
| Focus on the joint between the window trim and the wall | Focus on the joint where the window frame meets the siding |
| Also, check the joint where the window frame meets the glass | Also, seal around trim boards and any penetrations nearby |
| Good air quality inside helps the caulk cure faster | Temperature matters: do not apply below 40 degrees F |
| Work year-round; the weather does not affect the indoor application | Avoid application in direct hot sun or just before rain |
| Prioritize mold-resistant caulk in bathrooms and kitchens | UV resistance is essential for NJ's summer exposure |
| Helps fix drafty windows from the interior side | This is the most critical line of defense against water intrusion |
For most NJ homeowners, the exterior is the higher priority. One heavy rainstorm hitting a gap in your exterior window caulk can push moisture behind your siding and into the wall cavity before you even notice it indoors.
Common Mistakes to Avoid When Resealing Windows
Most resealing failures come down to a handful of easily avoidable errors. Watch out for these:
- Not removing old caulk first. Applying new caulk over old, deteriorated caulk is one of the most common mistakes. The new layer will not bond well and will fail early.
- Skipping the cleaning step. Even a small amount of dust, oil, or moisture on the surface can prevent proper adhesion. Clean everything and let it dry fully.
- Using the wrong caulk product. Interior-grade latex caulk on an exterior joint will crack and fail within a season. Match the product to the location and climate.
- Working in cold or wet weather. Exterior caulk applied below 40 degrees F or on a damp surface will not cure properly. Wait for the right conditions.
- Cutting the nozzle too wide. A large nozzle opening makes the bead hard to control and hard to smooth. Start small and adjust if needed.
- Leaving the tape on too long. If the caulk starts to skin over before you remove the painter’s tape, it will tear and leave a rough edge.
- Rushing the cure time. Getting rain or condensation on fresh exterior caulk before it cures can ruin the bond. Check the weather before you start.
DIY vs Hiring a Professional in New Jersey
Most window resealing projects are good candidates for DIY. But there are situations where calling a professional makes more sense.
When DIY Makes Sense?
- You have a few windows with visible caulk gaps or minor cracking
- There are no signs of water damage, rot, or mold behind the frame
- The windows are accessible at ground level or from a standard ladder
- You are comfortable with basic home maintenance tasks
When to Hire a Professional?
- There are signs of rot, structural damage, or significant water infiltration
- Windows are on the upper floors and require scaffolding or equipment
- You are resealing more than 10 to 15 windows and want the job done efficiently
- You are not sure whether resealing is the right fix, or whether replacement is needed
- The gap between the window and the rough opening is large and may require foam insulation or new flashing
A professional can also catch problems that are not visible to the untrained eye, like failing window flashing or early-stage rot behind the exterior casing. In many NJ homes, especially those built in the 1970s and 1980s, these issues are more common than homeowners expect.
Cost of Resealing Windows in NJ (2026 Guide)
Here is a realistic breakdown of what to expect, whether you go the DIY route or hire a contractor for your window caulking in NJ:
| Item or Service | DIY Cost | Professional Cost (NJ) |
|---|---|---|
| Caulk gun (basic) | $10 to $25 | Included |
| Caulk (per tube) | $5 to $15 | $Included |
| Materials for 5 to 8 windows | $30 to $70 | N/A |
| Professional labor (per window) | N/A | $50 to $150 |
| Full-home professional resealing (15 to 20 windows) | N/A | $500 to $2,500+ |
| Time investment (DIY, per window) | 30 to 60 minutes | N/A |
For most NJ homeowners with accessible windows and no underlying damage, DIY resealing is an excellent value. The material cost is low, the learning curve is short, and the savings on energy bills can pay back your investment within one heating season.
Seasonal Tips for New Jersey Homeowners
New Jersey’s four-season climate creates different window challenges throughout the year. Here is how to stay ahead of them:
Spring
Inspect for winter damage. Check exterior caulk after freeze-thaw cycles. Clean weep holes so water drains properly.
Summer
Best time for exterior resealing. Temperatures are stable. UV-resistant caulk is a must on south- and west-facing windows.
Fall
Highest-priority season for NJ homeowners. Reseal before November to protect against winter moisture and drafts.
Winter
Exterior resealing is not recommended below 40 degrees F. Do interior resealing only. Use door draft stoppers to supplement.
Fall is the most important season for window maintenance in New Jersey. Completing your resealing project before temperatures drop below 50 degrees F gives the caulk time to cure properly and your home maximum protection heading into winter.
If you discover drafts or gaps during a cold NJ winter and cannot safely reseal until spring, use removable indoor window insulation film or weatherstripping tape as a temporary fix. These are not permanent solutions, but they can reduce heat loss meaningfully until you can do the job correctly.
FAQs
How frequently do windows need to be resealed?
Every 3 to 5 years, depending on weather conditions and seal quality.
Can I reseal windows in winter?
It is not ideal because cold temperatures affect how the sealant cures.
What type of caulk is best for windows?
Silicone or acrylic latex caulk designed for exterior use works best.
How long does window caulk last?
Typically, 5 to 10 years if applied correctly.
Can resealing windows reduce energy bills?
Yes, it helps prevent air leaks and improves insulation.
Is resealing windows a DIY job?
Yes, for small gaps. Larger issues may require professionals.
How do I know if my window seal has failed?
Look for drafts, condensation, or visible cracks.
Can resealing fix foggy windows?
No, foggy glass usually means the internal seal is broken and may need replacement.
How long does it take to reseal a window?
Usually 30 minutes to 1 hour per window.
Should I reseal inside or outside first?
Start outside to block moisture, then seal inside for insulation.
Real-Life Scenario
Imagine a homeowner in New Jersey noticing cold air entering the living room during winter. Instead of replacing the windows, they resealed the gaps with proper caulk. Within days, the room felt warmer, and their heating bill dropped.
This shows how powerful a simple fix can be.
Conclusion
Learning how to reseal windows is one of the smartest home maintenance steps you can take in 2026. It’s easy to do, budget-friendly, and delivers excellent results.
Start by inspecting your windows, gathering the right tools, and following the step-by-step process. Small improvements can lead to big savings and better comfort.
If the job feels too complex or your windows need more than resealing, it may be worth exploring professional help. Many New Jersey homeowners consider trusted local companies like Home Makeover LLC when they are ready for long-term window solutions.

About the Author: Jeffrey W. Nero
Jeffrey W. Nero is a home improvement expert with over 20 years of experience serving homeowners in New Jersey. As the owner of Home Makeover™, Jeff combines quality craftsmanship with a deep understanding of local needs. From roofing and siding to deck remodels, Jeff has helped thousands of homeowners bring their visions to life. His commitment to excellence and customer satisfaction makes him a trusted partner in transforming homes across Central NJ.